CHQuilts: Craftsy
Showing posts with label Craftsy. Show all posts

Monday, November 6, 2017

MY quarter-inch seam took a licking, but kept on ticking


I need to work on my perfect quarter-inch seam. In spite of the challenges, I finally finished my first medallion quilt—thanks to this beautiful quilt designed by Lynette Jensen for a Craftsy class from last year. I mentioned this project in an earlier blog post.

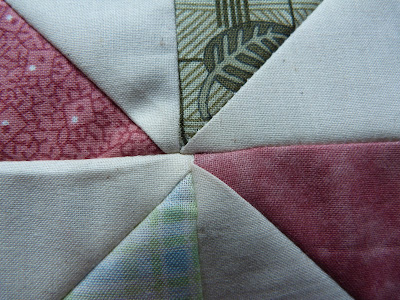
At left is the quilt Lynette Jensen designed. At right is the actual quilt top I completed. There are so many reasons I wanted to make this quilt, but the most important was that I knew it would be a challenge. It was!

I chose different colors, but I followed every direction exactly as written. She did a beautiful job of explaining details, by the way. But, I will admit, I struggled with this one. I’ve always had a problem with anything to do with triangles. Of course matching points is always tasking. My biggest issue was the border in the center—the purple border in my quilt—which was a bear for me. It included sewing lots of tiny little pieces, including lots of squares cut into tiny triangles. Speaking of which, I had a few issues with the hour-glass shapes in the very center, for that very reason. But, I got through that after a few tries.

The purple border would not have worked if my life had been dependent on perfect ¼” seams or else. I’m not sure where my hang-up was, the sewing, the pressing, the cutting, or perhaps a little of all three. I made it work and if you didn’t know I varied a few seams to make it work, you would never know. I definitely went from below scant quarter-inch to way beyond chunky quarter-inch seams.

Because I was so bothered by this, I decided to make a little table runner out using the same pattern. I wanted to diagnose where my problem was. This is the result, at left.

I concluded that I have a long way to go to be as proficient at quilting as Lynette Jensen, but that gives me something to strive for. This is just a matter of practice needed. The points are good. The seams are all in the right places. It is definitely not perfect, but I can live with this. So, I guess the old adage still applies, practice, practice, practice.

Tuesday, September 19, 2017

Just trying to make a point

I’ve decided to begin a new quilt project—a medallion quilt taught by Lynette Jennings for Craftsy. I remember Lynette Jennings from watching "Simply Quilts," so I'm thrilled to be one of her students.

This was a free class offered as the 2016 Block of the month from Craftsy. Since I wasn’t able to participate when the class was first offered, I am glad to be able to catch up.

The hardest part about this quilt so far, is picking out the colors. There are a lot of them. I could have just purchased the kit, but isn’t that why I buy fabrics? It took a little while, but I think I have this all sorted out finally.

This quilt looks complex, so I’m really anxious to get started. I do love a challenge. The first class was to make the hourglass blocks in the center along with the first border.

I had a heck of a time with all those points and bulky seams. It occurred to me that I have spent so much time practicing my skills in piecing and cutting, that I have neglected part of quilting that is really helpful—the pressing.

As I was putting my rows of three blocks together, I could hear Lynette Jennings' words echo in my head, “Press the rows in opposite directions.” Unfortunately, I heard her voice only after I finished putting the entire center together. I was not happy with my results, so I decided to take apart all the pieces and sew them again, pressing each row in opposite directions. 


Here are the before and after photos:
BEFORE
AFTER

A big improvement! Clearly, the before and after show that this little exercise was well worth my trouble. And despite my husband telling me I’m crazy for ‘unsewing’ that entire middle section, I’m glad I did. Besides, that is just how I roll.

Monday, February 8, 2016

Pillow talk

I have finally finished a project that wraps up my recent Craftsy Class--Quick Strip Paper Piecing. I've really enjoyed this class, taught by Peggy Martin. This project is a pillow using Martin's New York Beauty Block. 
  
 
This is the completed pillow, both from the front and the back. It is pretty heavily quilted, and I enjoyed every minute of it.


Story behind the project


I really wanted to make a pillow. I had an old pillow--a very old pillow in fact--that I wanted to transform from a hugging pillow to a decorative pillow. For years, I have had this really comfy feather pillow. I've washed it, vacuumed it, hugged it, and more often than not, thrown it around in my sleep,...The poor thing was once a king-sized pillow, but due to its age, and feather loss, it was reduced to half its size.

One day when I was making the bed, I decided to fold the pillow case in half around my favorite pillow. What used to require a large king-sized pillow case was now reduced to half of a standard one. And they say people shrink when they get older!

That got me thinking. As much as I loved hugging this pillow, it was time to re-purpose it into something pretty. When I saw Peggy Martin's New York Beauty pattern, I knew this was my answer. The bedroom is decorated with sunflowers. I just love the yellow and orange tones of these smiley-faced flowers. I also love the sun shapes, such as those seen on CBS Sunday morning. I'm so drawn by those pleasant shapes that make up the beautiful star that shines on us and sustains us each and every day.

It took a little while because I don't have the time to quilt as much as I'd like these days, but I finally finished my pillow. I can't imagine making a whole quilt in this pattern, because I just don't have the time. But I know that if I did, it would be a real spectacle. I love the pattern. I love Martin's technique. And I love my new pillow.

Here's what it looks like on the bed surrounded by all the other flowery projects I've loved doing over the years. It matches my big sunflower, a painting I did in a class several years ago which remains one of my favorites. Now, if only I could get my act together and paint these walls yellow. I've been wanting to do this for years and just not yet gotten around to it. One of these days,...

Sunday, August 9, 2015

Quilting is good medicine!


It might be impossible to expect all aspects of our lives to be positive, successful, or even worth talking about. But, I have to say, quilting is one of those facets in my life that is worth it.

For me, quilting is good medicine. When life's challenges get to you, nothing says 'hang-in-there' better than some quality alone time working with a needle and thread. Whether it be by hand or by machine, quilting is such good therapy.

Since my husband's illness, I have been turning to my favorite pastime as much as I'm able. It really helps. Quilting has a calming quality about it that makes coping just a little easier. It has the added effect of satisfying that creative spark. It is so nice to just be able to make something pretty. Let's face it, quilts are pretty. Rarely, if ever, have I seen an ugly quilt.

My quilt life is getting exciting once again, as I now have two projects to work on, at least so far. I once belonged to the get'r done camp, thinking that I had to finish one before I could start on another. But with quilts taking sometimes more than a year to finish, I gave myself permission to work on more than one at a time.

Orchid Flowers is coming along. In fact, I have all the Dresden Plate blocks finished and have started on the sashing. Who knew that the sashing would be as much or more work than the Dresdens, which are the focal point? I sure didn't, until I started sewing and cutting and sewing some more, all those strips.

Orchid Flowers
Here is my progress so far.

I have sashing on all the blocks. I just finished the 9-patches and sashing for the first row. I was worried that the sashing would overtake the Dresdens, since it is 2" wide and the Dresden strips are about 1.4" wide. But, it like the look. I'm anxious to finish the entire quilt top. I have no idea what kind of backing to use.

I've decided that I am going to quilt this on the machine, which will be a first for me--quilting a whole quilt top--rather than just a block at a time. I'm looking forward to this challenge.

There is still lots left to do before any more decisions are made. I have cut all the pieces for the sashing and cornerstones, I think. I'm not that great at math, so it will be fun to see if I came anywhere close to how many strips I'll actually need. No matter--I have more fabric if I need it. Aren't those colors just delicious?

I started this quilt a very long time ago. I was surprised when I came back to it, that I cut the initial blocks 12". I did it before I realized there should be a seam allowance added to the block. So, the blocks will finish at 11 1/2" No big deal. I will make up for it with the wider sashing and eventual borders around the entire quilt. I have a very dark violet color for the outside border.

The outside border fabric for Orchid Flowers is a Jinny Beyer fabric.

I have long been a fan of hers, since the early days of my watching Simply Quilts,which I mentioned in a previous post. I also mentioned that I was considering ordering Jinny's Block of the Month Club quilt kit from Craftsy.
She is teaching a class detailing so many of her techniques.

I bit the bullet. I decided to order the quilt kit. I have never ordered a kit before. It was a bit pricey, but was on sale since the class started months ago. I'm glad I waited.

The kit arrived yesterday. I haven't even taken it out of the bag yet, although I did stick my hand inside, so I could pet the luscious fabrics. Jinny's taste in colors and fabrics she designs are just magnificent. I love her border prints, which really is what sold me on this class and this kit. I don't plan to open it until I am ready to begin the project. Until then, I just plan to ogle it.