CHQuilts

Thursday, September 21, 2017

Blogging, comments, and quilting


I love quilting and I love writing which is why I started blogging in the first place.

CHQuilts actually grew out of another blog, CHMusings, which is, as the name implies, all about the things I ponder, what matters to me, and all 
that I love in my daily life. No question, CHMusings is personal. It is for that reason that quilting was often times a topic. When it dawned on me that I was writing about quilting quite often, I decided to start CHQuilts.

Funny, one of the most read posts in CHMusings, is about quilting, entitled, “New way to mark the quilt.” Feel free to check it out by clicking the link. 
Marking the quilt has always been a sore spot with me. One day I decided to try a new technique I'd heard about using Glad Press & Seal. 

Most of the posts I write come from my own experience. I try to write about as many teaching moments, or should I say learning moments. I'm learning new things all the time, as a former city girl who lives in the woods after moving to the Arkansas Ozarks. I do believe I have found my niche here.

For the record, I also write two other blogs, CHBlog, which has a political bent and CHontrack, which showcases my interest in NASCAR, have lost some appeal for me lately. I’m sorry to say, they have been a bit neglected lately. I still write in them from time-to-time, but honestly, I’d prefer to spend my days quilting.

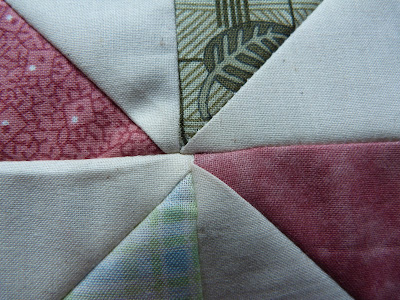
I’ve found that the more I learn about quilting, the more I want to learn. There are always new questions, new techniques, and new ideas. There will always be a new quilt inside my head. 

I’m not a professional blogger by any means, I just write about things that interest me, but the one post about marking the quilt seemingly has sparked some interest. I love it when folks make comments. I love the conversational aspect of quilting and blogging. And I love the constant flow of information. It comes in so many forms. Quilters are generally curious and caring. Quilters love to share, and learn from one another. Quilters are a complete inspiration to me. There are so many aspects to quilting that I love, but meeting other quilters certainly ranks high on that list.

So thank you to everyone who reads these posts; thank you to everyone that can relate in any way to quilting, and of course, those who comment on this and all other platforms from Facebook to the Quiltingboard to Craftsy pages, etc. I love the conversations. I love learning from you all, for you make me a better quilter.

Tuesday, September 19, 2017

Just trying to make a point

I’ve decided to begin a new quilt project—a medallion quilt taught by Lynette Jennings for Craftsy. I remember Lynette Jennings from watching "Simply Quilts," so I'm thrilled to be one of her students.

This was a free class offered as the 2016 Block of the month from Craftsy. Since I wasn’t able to participate when the class was first offered, I am glad to be able to catch up.

The hardest part about this quilt so far, is picking out the colors. There are a lot of them. I could have just purchased the kit, but isn’t that why I buy fabrics? It took a little while, but I think I have this all sorted out finally.

This quilt looks complex, so I’m really anxious to get started. I do love a challenge. The first class was to make the hourglass blocks in the center along with the first border.

I had a heck of a time with all those points and bulky seams. It occurred to me that I have spent so much time practicing my skills in piecing and cutting, that I have neglected part of quilting that is really helpful—the pressing.

As I was putting my rows of three blocks together, I could hear Lynette Jennings' words echo in my head, “Press the rows in opposite directions.” Unfortunately, I heard her voice only after I finished putting the entire center together. I was not happy with my results, so I decided to take apart all the pieces and sew them again, pressing each row in opposite directions. 


Here are the before and after photos:
BEFORE
AFTER

A big improvement! Clearly, the before and after show that this little exercise was well worth my trouble. And despite my husband telling me I’m crazy for ‘unsewing’ that entire middle section, I’m glad I did. Besides, that is just how I roll.

Friday, September 15, 2017

Spray basting, plan B

I admit it; I was pretty bummed about my first attempting at spray basting a quilt, detailed in an earlier post

But that is behind me. What I didn’t reveal, because I only realized it later, is how important it is to read directions. I had no idea I was supposed to finish the bonding process by pressing the piece. Needless to say, my failing to perform that all-important step, resulted in the layers not sticking together. Once I realized my mistake, I was a little bummed. Beyond my own foolishness was the knowledge that I had to spray baste the whole quilt all over again. I knew it would be even be more challenging this time, since I had already quilted an entire motif, right in the center of the quilt that I would have to work around.

I decided that working on the floor was just not an option this time around, so I cleared off the dining room table, put the leaf in it, and set out to flatten out my quilt, upside down. Of course the table wasn’t big enough to accommodate the entire quilt, but I moved it around, folded back some at a time to spray every little nook and cranny, keeping the back as wrinkle-free as possible. Then I pressed it, as it sat on the table. I’m sure that wasn’t good for the table, but a woman has to do what a woman has to do. I made sure I kept the iron moving and it didn’t appear to get too hot three layers down. Once the back was all sprayed and pressed, I worked to secure the quilt top to the bottom fabric and batting which was now one layer since it was stuck together. I walked around that table a gazillion times, folding, smoothing, spraying, smoothing again, and finally pressing. Finally, it was all done. When all else fails, read the directions. So for now, I’m a fan of spray basting. It is so much easier than all those darned safety pins or sewing.

My next challenge is to quilt with or without a hoop. I tried using a large oval hoop, but that was just too cumbersome. Then I dragged out a smaller round one, which was a definite improvement. But, it is actually so much easier to quilt without a hoop at all. Hand quilting got a little easier, once I got the feel of it again. I recently watched Alex Anderson of Simply Quilts and The Quilt Show fame as she spoke about learning to hand quilt. She said to give yourself about 20 hours to get comfortable with hand quilting. I’d say that is about right.

It will be more fun to quilt when it gets cold outside. There is nothing more relaxing than quilting and snuggling all at the same time. 

Monday, September 11, 2017

Accommodating my quilting bucket list

I’ve wanted to make a rag quilt for some time. I’ve also wanted to make a string quilt. Add to the mix, my desire to make a little quilted rug for my bathroom. I had a quilted rug before, but decided to use that as a table topper for my new file cabinet. So, I had nothing in front of the sink. That is no place for a naked floor, so I put all my bucket-list desires together and came up with a plan. 

This is the result. 


I took some leftover scraps from a yellow quilt, cut them into strips and made a few blocks. I got tired of that, and figured nine was enough, so I just alternated them with a few neutral yellow blocks. I made them all 6 ½-inch squares. Then I cut the same number of squares for backing, and a similar number of 5 ½ inch squares of batting. I placed all three together sandwiches together and sewed a simple “X” across them to hold them in place. I sewed a ½” seam between the squares.

 It was all done in one day. While watching TV that night, I snipped the seams, rather closely—in fact—close enough to make my fingers sore. I got it slightly wet and threw it into the dryer. The more I wash it the better it will look. For now though, it suits my purpose. I can’t wait to make a full size quilt with this simple method, but not until I invest in some ratchet scissors for all that snipping.

I have been saving old blue jeans just for this purpose. And, I have the cutest pink heart flannel to go with it. One of these days, I will actually get to it.

Friday, September 8, 2017

Quilting never ceases to amaze me

I just realized that one more aspect of quilting--one that I had never even considered--is how it has improved my writing.

No, I don't mean writing as in crafting a blog post, I mean my actual handwriting. I'm a handwriting fan, always have been and always will be. When I heard that some schools wanted to do away with teaching handwriting, I was livid. I think it is a vital communication skill that is also a well-rooted tradition. Imagine if John Hancock and other signers, simply printed their names on the Declaration of Independence. But that is another blog post in another blog. In fact, I already wrote it. https://rural01.blogspot.com/2012/07/cursive-writing-should-always-be-taught.html

But back to quilting. I've noticed that since I've been free-motion quilting, I have to consciously try to keep straight lines straight, without marking the fabric (because I hate to mark). I have learned to judge distance from seams and other lines of quilting; in essence training my eye. I used to be embarrassed about my writing, because it was always uphill. I compensated by always buying stationery with lines. 

I'm old enough to remember when we used to write letters to friends and family. I always loved to communicate, so I wrote lots of them. I used to receive many compliments on my penmanship. When I was in grade school, it was my best class. I remember once my mother-in-law had to send out thank you notes for some occasion. I was honored that she asked me to write them because she liked my writing. Personally, I don't think it is anything special, but I do enjoy writing, even though most of my writing is done on the keyboard now, like everyone else. 
grocery list

I did notice though, while writing a shopping list or addressing an envelope, or whatever I write, that I don't write uphill anymore. Oh, there is still a little hint of it, but not like before. By the way, please don't judge my handwriting skills from this tiny snippet. And by all means, don't judge my spelling skills here either. Who spells strawberries with only one "r"? 

Anyway, you get the point...This is just another reason to love quilting. 

Saturday, August 26, 2017

I spray-basted a quilt for the first time

chquilts: ready to quilt
Ready to quilt my purple Dresden Plate quilt

I tried spray basting a quilt for the first time. Whoa, there has to be a better way. Or, I’m just not doing it right.

This exercise reminds me that when I said I loved every aspect of quilting, I lied. It isn’t a lie really, I’m just in denial about this part of the quilt making process. I have never been fond of this fundamental step-- putting a quilt top together with its batting and backing fabric—before the real fun begins. It is a very important step however.

I’ve tried several different ways and haven’t found one that doesn’t make me grit my teeth. I’ve used the traditional safety pin method, where I generally get aggravated or impatient or both, causing me to start skimping on the number of pins I use. I’ve tried Sharon Shamber’s method of rolling the quilt onto boards and then basting the three parts together a little at a time. She makes it look so easy. This is probably one of the best methods I’ve seen, but it remains timely and cumbersome with a large quilt in a small space, which is what I have to work with. This is why I wanted to try the spray basting method. I used 505 adhesive spray.

The only positive thing I can say about this step in the quilt making process, is that it is necessary. Without it, there is no process; There is no quilt. For me, that is just not an option. So, I will continue to grit my teeth.

While I recognize that perfecting this technique would be well worth it, this was just my first time spray basting. I do see the benefits. Admittedly, I struggled with getting all the layers smooth. I disliked all the on-the-floor, off-the-floor, on-the-floor that was necessary. I think hanging the quilt would make it much easier than rearranging all the living room furniture, shooing the cats away, and hoping I didn’t glue all my belongings together, not to mention the bending, stooping, and walking in circles. My only hope is to try Patsy Thompson’s method, which involves hanging the quilt and letting gravity help keep things straight. I will try that next time.

Spray basting was only part of my problem

This is also the first time I used an oversized backing fabric. I had picked out a fabric that I already had, but didn’t really like it. I decided to purchase a nice piece of lavender print that was 104” wide. I bought four yards of it.

I have been looking at this quilt for some time, actually. It was started ages ago. As outlined in a prior blog post, initially I wasn’t happy with it. It was square, so I enlarged it, adding an entire row with four brand new blocks, all the sashing and cornerstones. I was amazed how well that worked. If you didn’t know, you wouldn’t know. Then I decided I wanted to add the final border. I love how that turned out. It makes the quilt about the right size and in my mind, sets off the pattern nicely. But working with all that fabric was a headache.

First I got out my iron and ironing board. Yikes! By the time I pressed the last of it, the first part was already wrinkled. I just looked at it for a few days, wondering what to do next. I laid out the back, unrolled the queen sized batting on top, then added the quilt top. There was lots leftover. I trimmed away some of it, which helped a little. The table I was working on was always adequate in the past. I’m not sure why it was such a struggle this time, but it certainly was. Finally, I folded the would-be quilt, with all three pieces and left them for a while. I had to figure out what, where, and how to get this thing basted.

Finally I decided Friday night was it. Tired of looking at this pile of pretty purple fabric, I want to start quilting again. I decided the living room was it. I vacuumed. I moved all the furniture. I used painter’s tape to secure the corners and the middle of the backing fabric. Of course the tape didn’t stick to my vinyl flooring. I did the best I could though and spray basted one half at a time, first the top to the batting, then the batting to the backing. Then the other half. I did the best I could. Finally, I was able to slide a quilting hoop into the middle and secured it into place. Just the look of a quilt ready to be quilted is comforting to me. I placed the quilt hoop onto a wooden snack tray. The quilt drapes onto the floor, but should stay in relatively good form. Ryan, my cat loves new quilts, so I placed a towel on it to protect it from cat hair. Ryan is now its guardian.

I’ve decided to hand-quilt this quilt. I think the traditional pattern deserves traditional quilting. I’ve already taken a few stitches. Oh my, this is not comfortable. I am very rusty. I will need lots of practice, but that will come. I started by drawing a spiral into the middle of one of the Dresden plates. Wow, this is harder than I remembered. So much for quilting being a relaxing activity. Right now, I’m tense, the lighting is terrible where I’m working, my stitches are not uniform, and I definitely need to find my rhythm. That will come. Now, I’m ready for those cold, winter nights. Bring it on!

Sunday, August 6, 2017

Lone quilter

People often ask me if I belong to a guild or quilting group. Sometimes they look at me funny when I tell them, no, I’m a lone quilter.

While I’m not averse to the social aspects of quilting in a crowd, lone quilting is more than an activity to me; it is a philosophy. I think of quilting as a form of meditation. It is an activity that allows for deep personal thought. It is therapy. I find I am very busy these days and juggle lots of responsibility. There is seldom enough time in the day to accomplish all that needs to be done, so often times, I don’t even try. I am not the kind of person that frets over a sink full of dirty dishes. I figure they will wait for me. I always get around to the chores that need doing, but I get around to them on my time.

Quilting is one activity I want to make time for. It is a kind of precious gift I give to myself, not unlike baking myself a birthday cake. I relish the alone time, feeling free, as my mind wanders wherever it wants to go.

I am a self-taught quilter who enjoys learning new things, especially something creative that inspires me. And though I’ve been quilting for nearly 20 years, I still consider myself a newbie. There is so much to learn, to try, and to practice. This type of learning requires deep concentration, where all my faculties can engage with little distraction.

But just because I don’t physically go elsewhere to work on a quilt, that doesn’t mean I don’t belong to quilting groups. In fact, I do belong to several on the computer. Modern quilting allows the best of both worlds--lone quilting and social interaction. Internet quilting groups are great for advice, counsel, and camaraderie. Online sources also offer nearly endless learning potential.

Ironically, one of the most inspirational aspects of quilting for me, is its rich history. The quilting bee was a huge part of the history of quilting; its root remains relevant today in various guilds and church groups. I have always been drawn to stories about brave American pioneer families who traveled west to seek a better life. Quiltmaking was a huge part of the American story in the late 18th and early 19th centuries. Quilting was a social activity for women of the day, but moreso, handmade quilts were a necessity for survival during long, cold winter months. Women’s use of fabric from worn out clothing and livestock feed sacks was necessary for their survival.

Socialization with other women, as well as the need to finish sewing together the pieces of cloth that would warm their families, was probably as psychologically necessary to pioneer women as lone quilting is to me today.

Quiltmaking has gone through such evolution. No longer strictly functional, the modern quilt story is much more complex. Traditional function remains one of its amenities, but quilts today represent everything from a way to earn a living to the creation of fine art. Quilts come in various sizes, from huge bed quilts to table runners, wall hangings, and candle pads. They use design and color in new ways as well. Modern quilts range from the traditional log cabin, bear paw, and churn dash quilt blocks to the complex computer-drawn star points. There are also new uses of a variety of fabric and thread. The creations are limited only by their creator's imagination and skill.

There is no end to the inspiration, which is largely what intrigues me the most. I want to make a rag quilt, a one-block wonder, bargello, art quilts, and so much more. I want to improve my paper-piecing techniques, and learn new free-motion quilting designs, as well as hone my skills on those I’ve already done. I want to return to hand-quilting, and further experiment with color.

I finished my first quilt in 2003. I have made many more since. I knew then that I loved quiltmaking and I would be a quilter for the rest of my life. My quilting journey has shown me there is no end to this creative process. Every new idea brings about an endless stream of new ideas, limited only by our own imagination.

While I will likely never go to a quilting group, I do belong to several virtual groups. The computer is another tool that has enhanced the quilting experience. I have learned so much because of the ability to watch other quilters on videos. I owe each of them a debt.