CHQuilts: December 2019

Monday, December 30, 2019

Always have to have a Plan B

With the holiday in the middle of the week, there have been just too many things to do to get to quilting, but now, the errands are done, the house is somewhat liveable, and most of the chores are done. It is time to get to it.


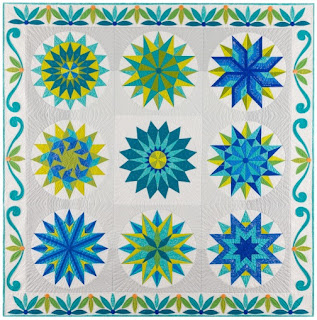
I was so excited to finally start working on the end of my quilt top--laying out my applique pieces for the top and bottom borders of my quilt. I have yet to cut the fabric for the borders. That was where I planned to start. That was yesterday.

Time for Plan B
Thing is, I realized that according to the pattern, the side borders were to be positioned first. I hadn't even started to work on all those applique pieces. That means I had to cut out and prepare (gluing all the raw edges) them. Thankfully, there aren't as many, however, those swirly shapes are a bit more complex.

Once I cut out all the pieces, I was anxious to use my double finger press method to prepare all the applique pieces expeditiously. 

I recently purchased a new glue stick from Sewline. It is much smaller, and easier to hold like a pencil. It is much less clunky than the giant Elmer's glue stick I had been using. The smaller surface made it less messy. The glue stayed where I put it. 

It seemed to me though that the glue wasn't quite as sticky, but once it was pressed with the iron, it seemed to hold even better. 

I spent the day yesterday cutting all of the pieces and preparing all but the swirlies. I hope to finish those today. Perhaps this quilt top will be completed by the end of 2019--stay tuned. 

Saturday, December 7, 2019

Easy applique with the double finger press method

When trying to prepare pieces for applique for the border of my quilt, I have tried using various tools to help with this somewhat tedious task. But, I realize the old adage that the best tools are my own hands.

I’ve tried many different methods of preparing shapes for applique using a template, but I’ve finally settled on the one that works best for me. It is the simplest method I’ve found and is the one I am the most comfortable with. It is my own double finger press method.

I have been using an Elmer’s School Glue stick to glue the raw edges under and a portable iron to press the finished pieces. I then use my double finger press method to create nice shapes that resemble my template.

I’ve attempted to illustrate my favorite applique method below:


This small leaf shape was cut out of freezer paper and pressed to the right side of the fabric. Once adhered, I roughly cut out the piece with a small seam allowance. Precision isn’t important here as long as there is enough fabric for a turned under edge.

The next step is to simply finger pressed the fabric to the back of the shape, all around it. Firmly finger press the piece all around the edges along the shape. I used to have little respect for finger pressing, but in this instance, it paves the way for a nice rounded finished piece. This extra step only takes a moment and makes all the difference.

When the shape is pressed, apply glue to one side of the shape at a time, and again, finger press as was done earlier. Gently move around the shape to make a nice rounded edge. 

When all the edges are finger pressed, and the point is secured with the glue, just snip off the excess to create a perfect point.

Turn the shape over to make sure that all the parts are glued securely. If not, apply a bit of glue where needed. I generally use a manicure stick for this purpose, though it is rarely needed if enough glue is applied correctly at the onset.

Once completed, remove the paper and give the shape a quick press with a hot, dry iron. The leaf is now ready to be applied to the surface of the quilt, either by hand or by using a machine applique techniques. 

I’m pretty pleased with how these tuned out as shown below.